Have you ever had a broken ratchet gearwrench? It can be very frustrating. Don’t worry! Fixing a ratchet gearwrench is not that hard. Follow these easy steps to get your tool working again.

Credit: www.gearwrench.com
What You Will Need
Before starting, gather these tools:
- Screwdriver
- Clean cloth
- Ratchet repair kit
- Lubricant
Step-by-Step Guide
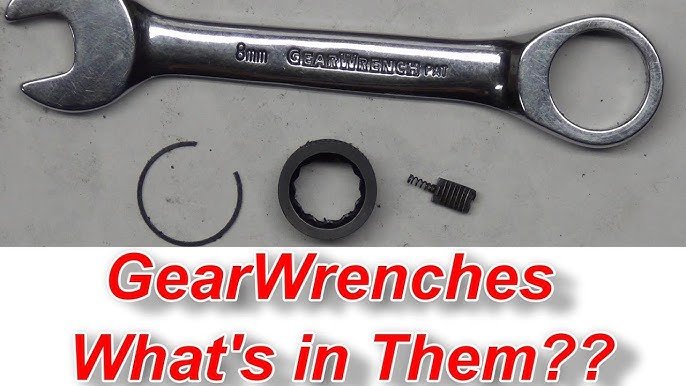
Step 1: Disassemble The Ratchet
First, take apart the ratchet gearwrench.
Use a screwdriver to remove the screws. Keep the screws safe. You will need them later.
Step 2: Clean The Parts
Next, clean all the parts. Use a clean cloth to wipe away dirt and grease. This will help the ratchet work smoothly.
Step 3: Inspect The Parts
Look at all the parts carefully. Check for any broken or worn-out parts. Replace these parts with new ones from the ratchet repair kit.
Step 4: Lubricate The Parts
Apply a small amount of lubricant to the moving parts. This will make the ratchet gearwrench move easily. Be careful not to use too much lubricant.
Step 5: Reassemble The Ratchet
Now, put the ratchet gearwrench back together.
Start by putting the gears back in place. Then, reattach the screws. Make sure everything is tight and secure.
Tips for Maintaining Your Ratchet Gearwrench
To keep your ratchet gearwrench in good shape, follow these tips:
- Clean it after each use.
- Store it in a dry place.
- Lubricate it regularly.
- Check for worn-out parts often.

Credit: www.youtube.com
Common Problems and Solutions
Here are some common problems you might face and how to fix them:
| Problem | Solution |
|---|---|
| Ratchet slips | Clean and lubricate the gears. |
| Ratchet sticks | Check for dirt and clean thoroughly. |
| Ratchet does not turn | Check for broken parts and replace if needed. |
Conclusion
Fixing a ratchet gearwrench is easy if you know how. Follow these steps, and your ratchet will work like new. Keep your tools clean and well-maintained to avoid future problems.